DIY Your Own Product Photography for $0
DIY your own product photography for $0… sounds too good to be true. Well, it’s not! You don’t need a professional photographer, to own a fancy camera, or hire a photo editor to capture good product photos. Let’s walk through the process, step by step!
Gather Your Supplies
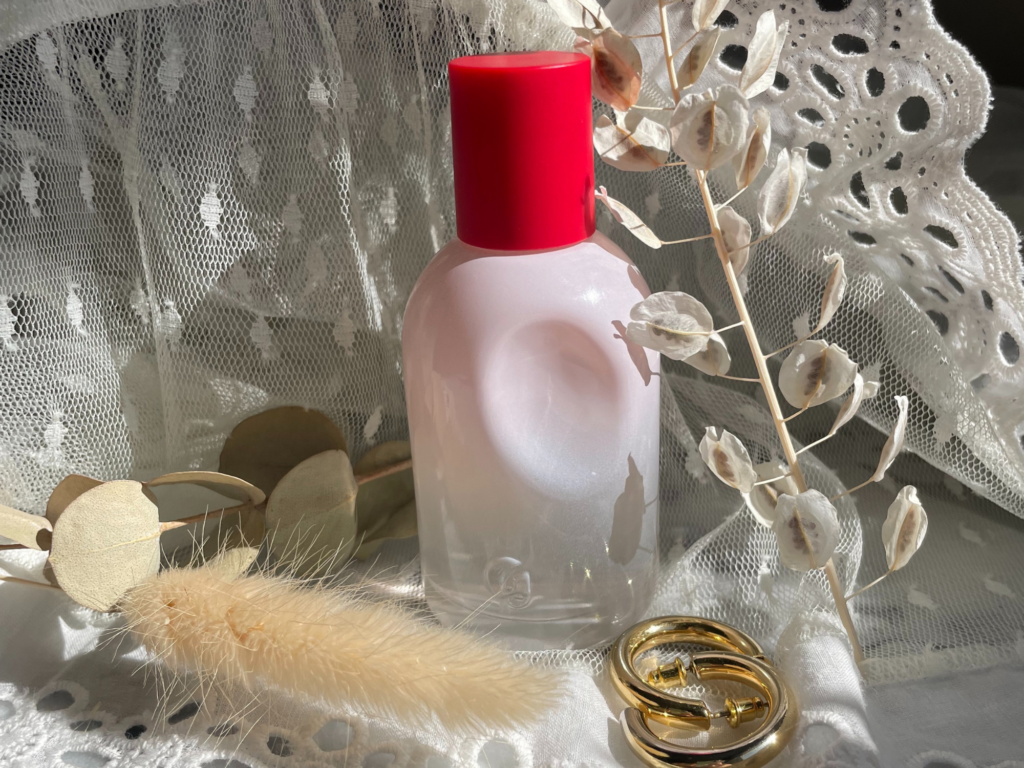
This step is easier than you may think. For example, I used clothing from my own closet. I looked for interesting fabrics and colors. My eyes caught a silk green blouse I own and a detailed lace swimsuit cover. I ended up only using the lace dress as a prop, but don’t be afraid to grab a few options! Pro Tip: Stay away from busy patterns and bold colors. You’ll want to play around with your props until you get the aesthetic you’re aiming for.
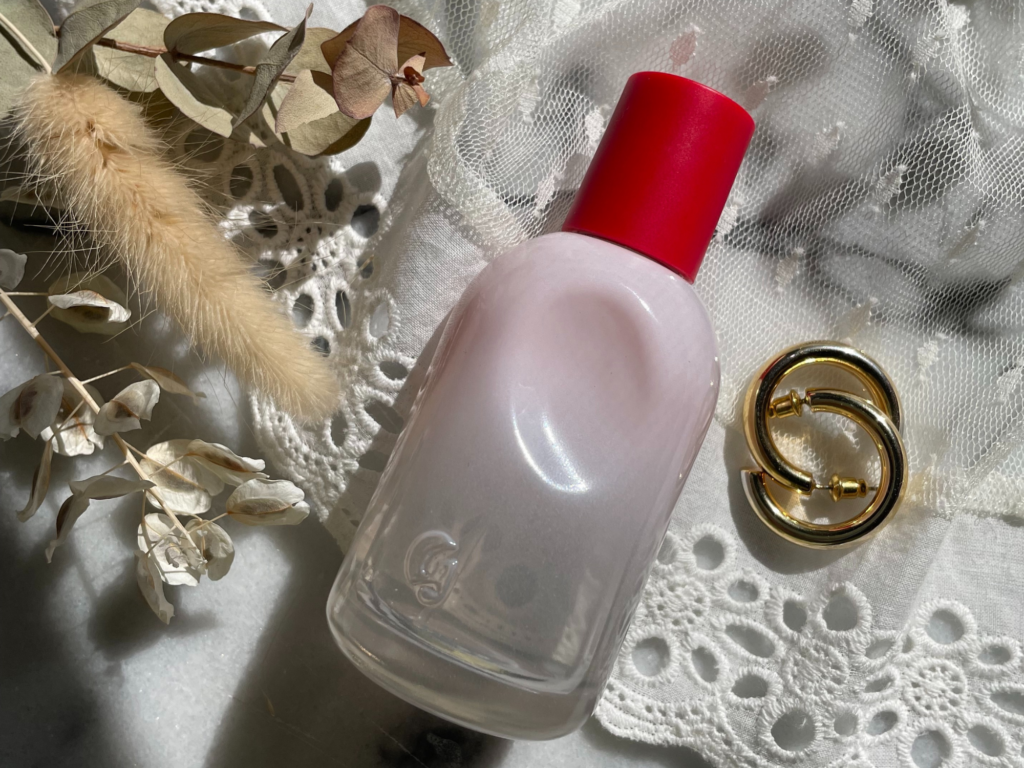
I also grabbed some simplistic jewelry I had laying around and some dried flowers I had in a vase I own. Keep in mind, these items are not the focal point, but items to enhance the photo and make it more captivating.
The last props I grabbed were a mirror and a marble slab I had in my kitchen. These were more for adding texture and an artistic touch to the surface and background, but these items are not completely necessary. If you don’t have a mirror or similar prop to granite, consider taking the fabric you grabbed from your wardrobe to use as your surface or backdrop.
You can also get fabric from places like Michaels, or Joann Fabrics if you feel like you don’t have anything at home!
Get Your Camera Ready + Find Your Lighting
As I mentioned above, you do NOT need a professional camera for this. An iPhone is ideal for this! We have tips listed here for how to get your camera adjusted in the right settings, as well as how to prepare your product for the shoot, and find natural lighting.
Prep Your Layout
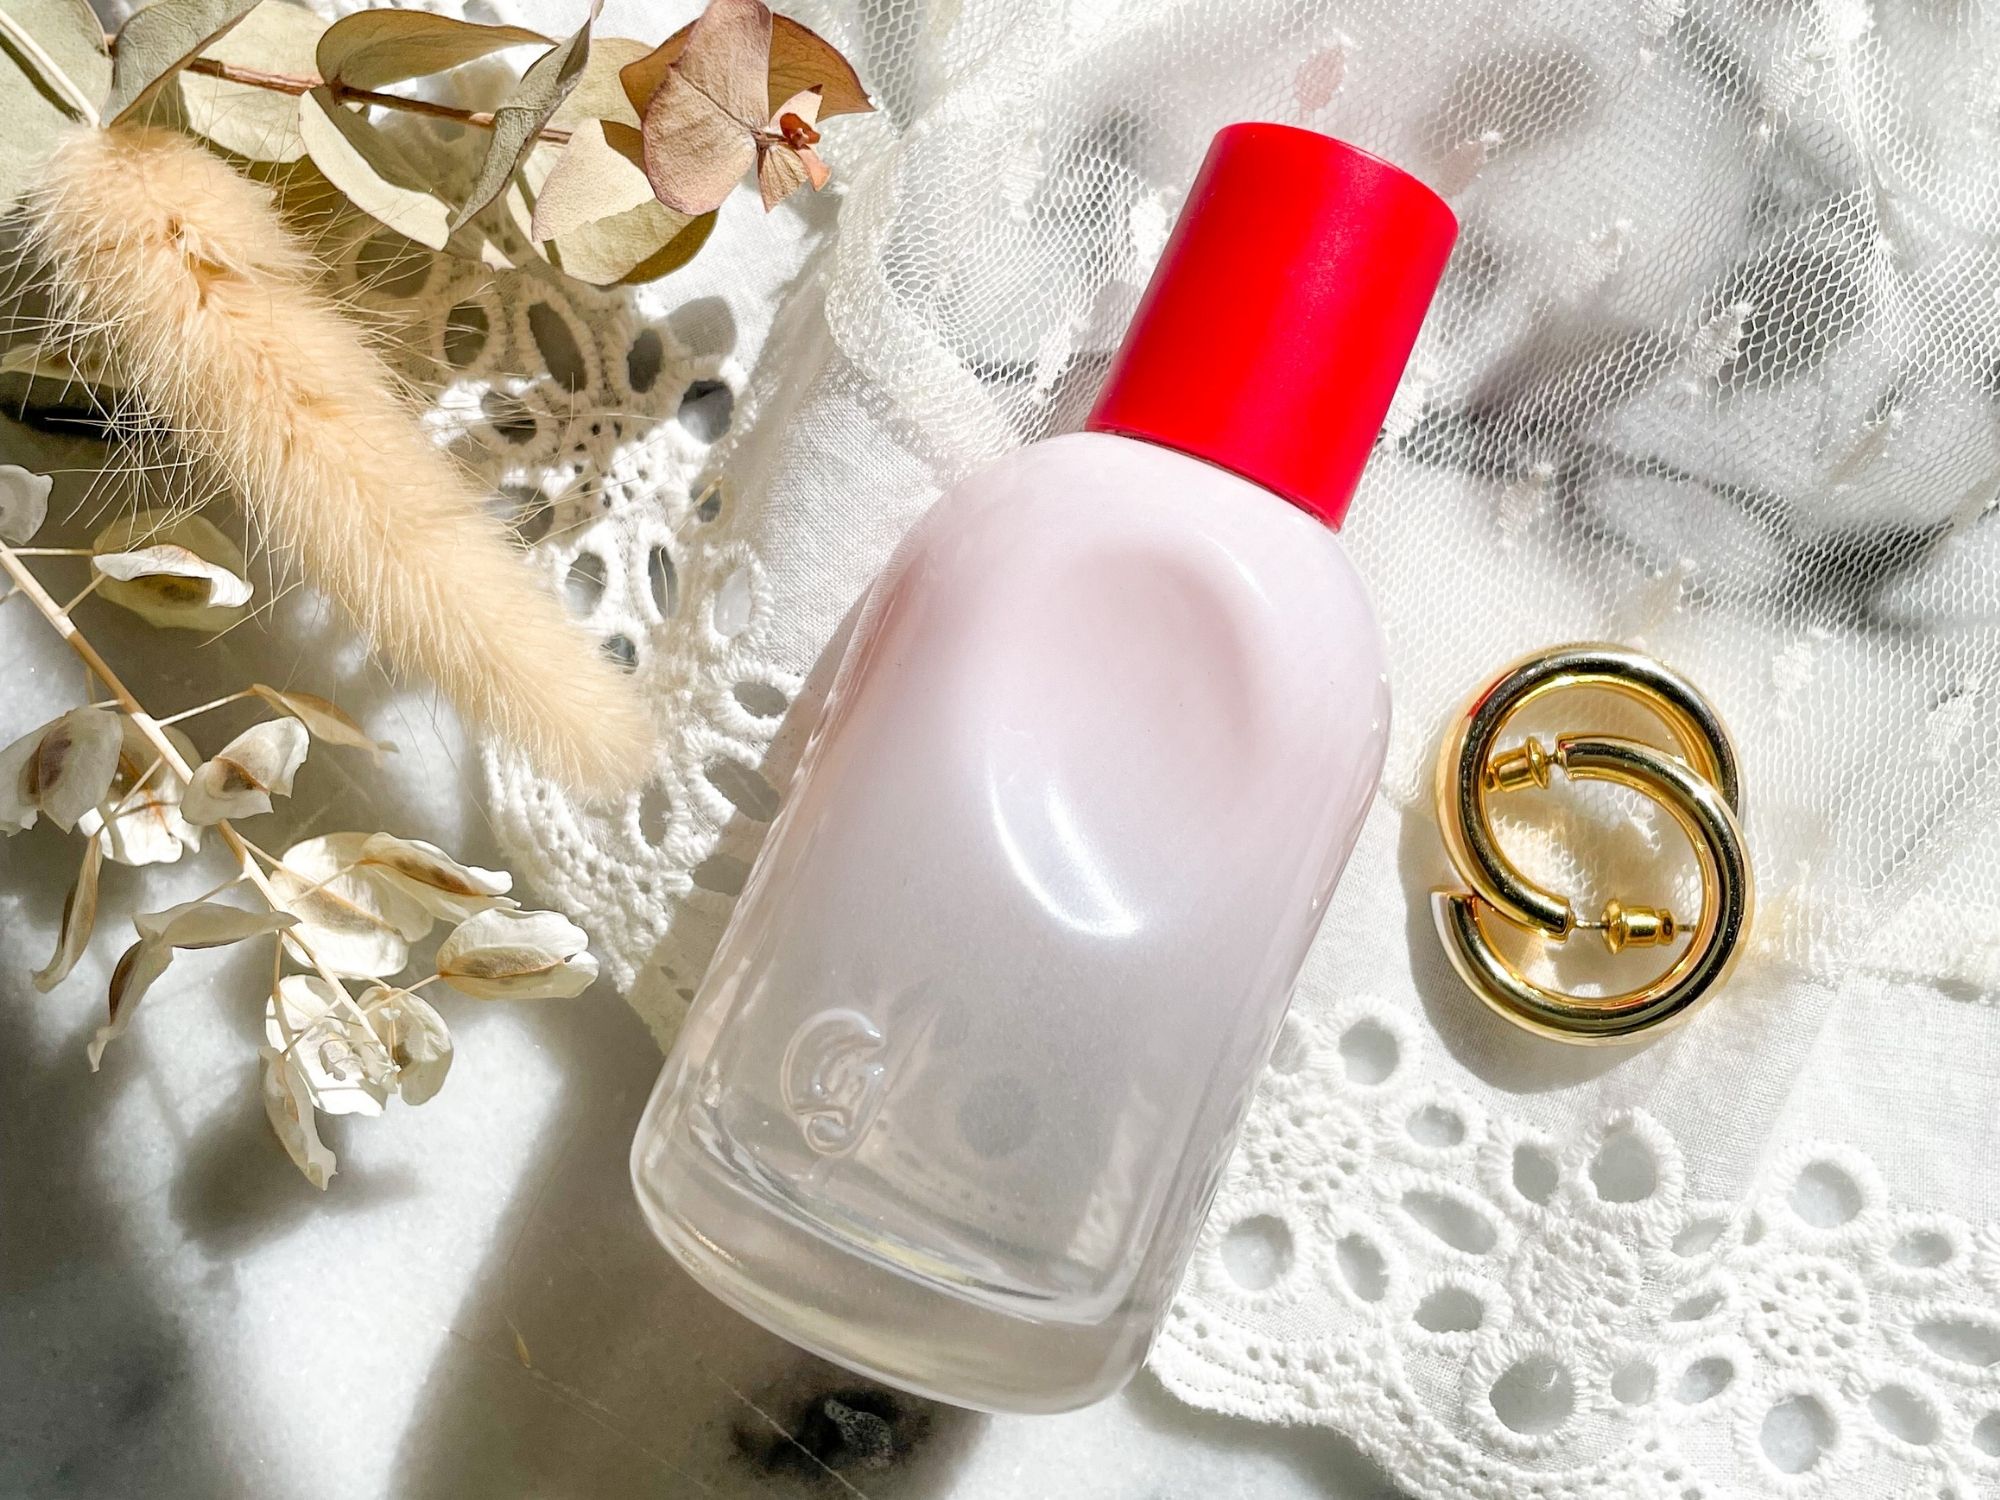
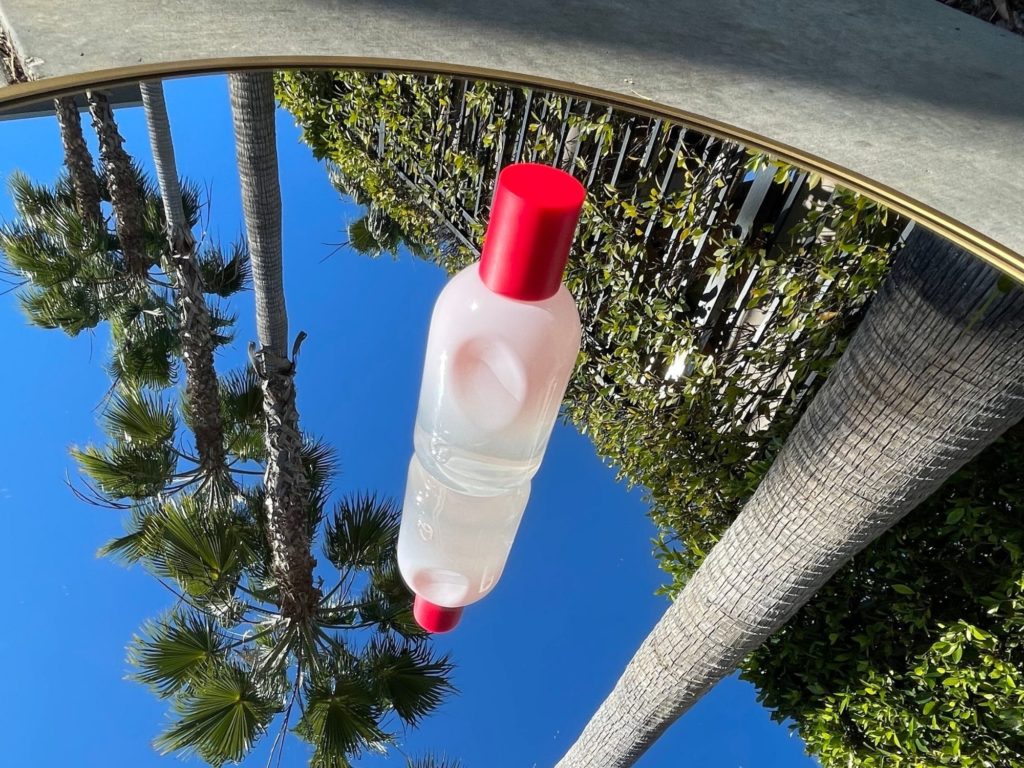
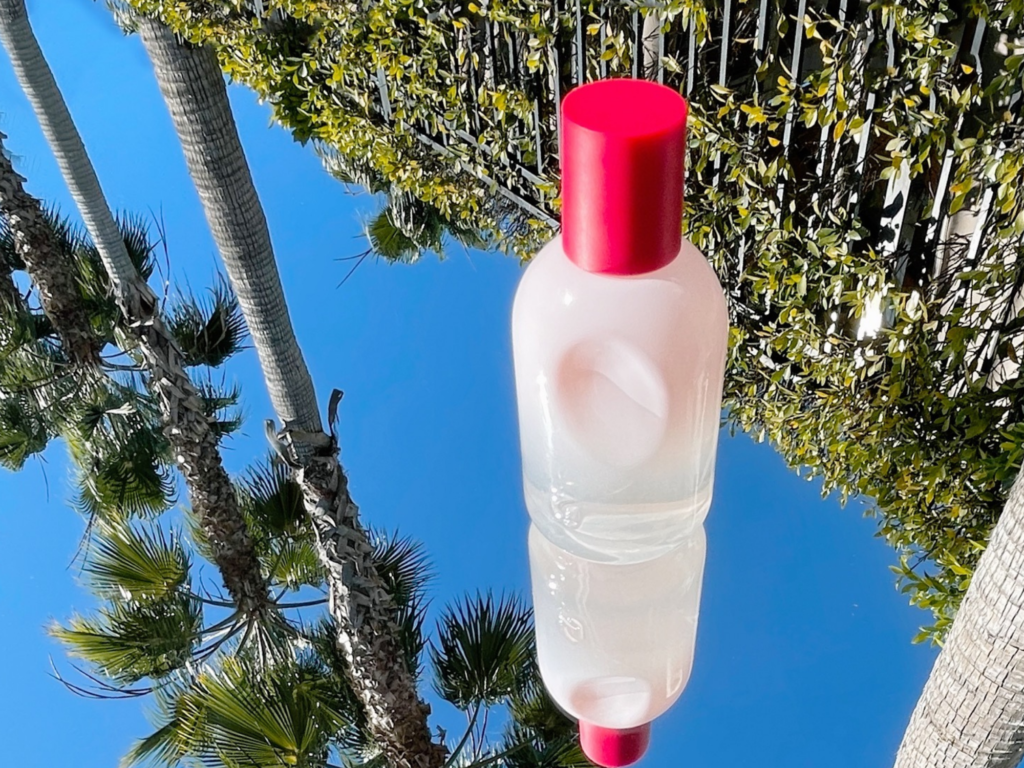
After you’ve adjusted your iPhone, prepped your product, and found your lighting, you’ll be ready to put together the layout for your perfect shot! For this project, I’m using my Glassier perfume as the focal point. The first shots I took were done outside with a mirror. Since the mirror reflected the sky and palm trees, additional props were not needed (you don’t want the photo to appear too busy).
The second round of shots were taken inside. I found a window with direct sunlight that had a few shadows from the blinds. The shadows help make the shot more interesting.
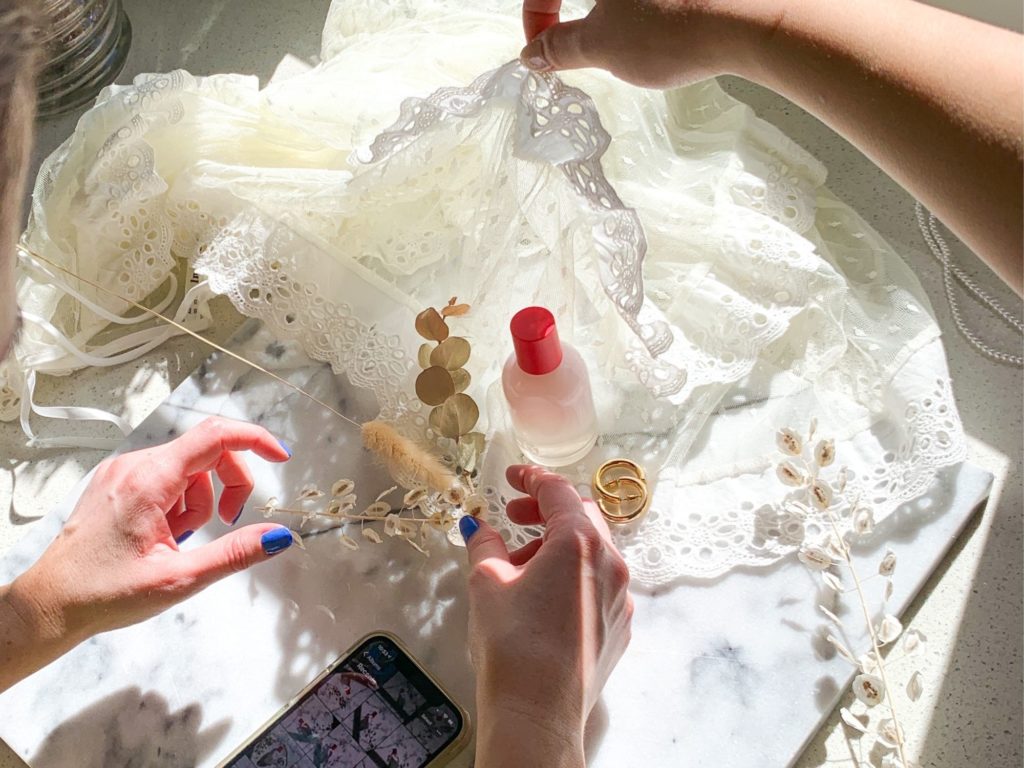
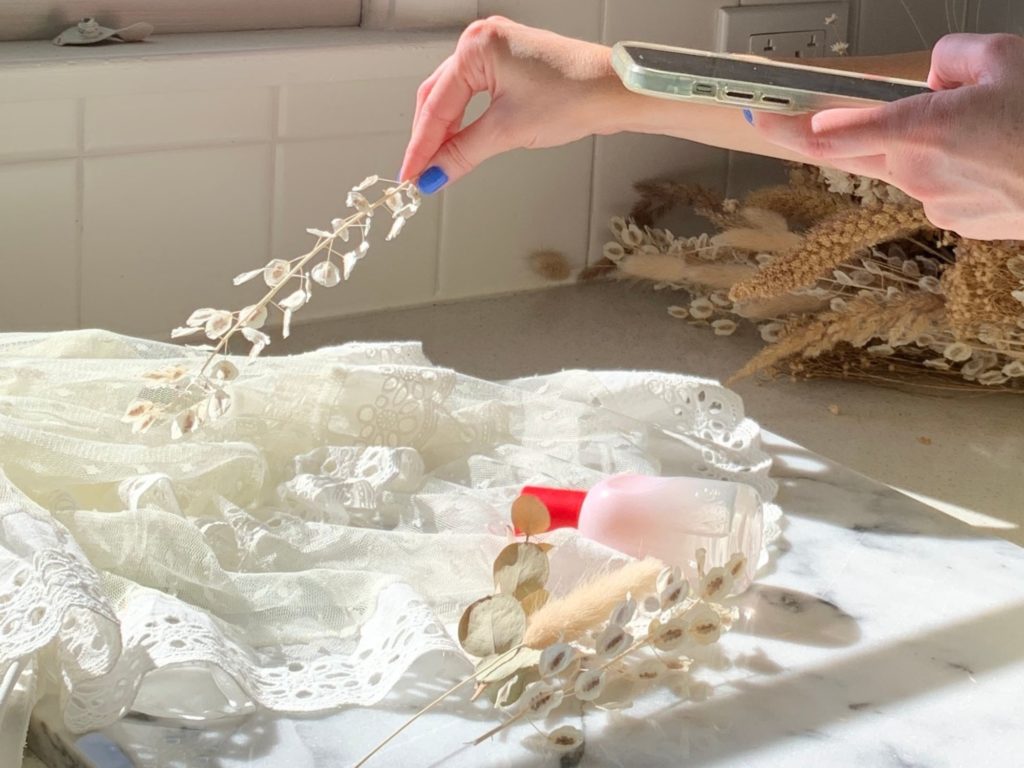
Next, I set my props down and organized them in a way that I thought was pleasing to the eye. This definitely took a few tries! I took multiple shots so that there were several options to select from. Don’t feel like you have to use all your props at the same time. Add and take away as needed!
Capture the Perfect Image
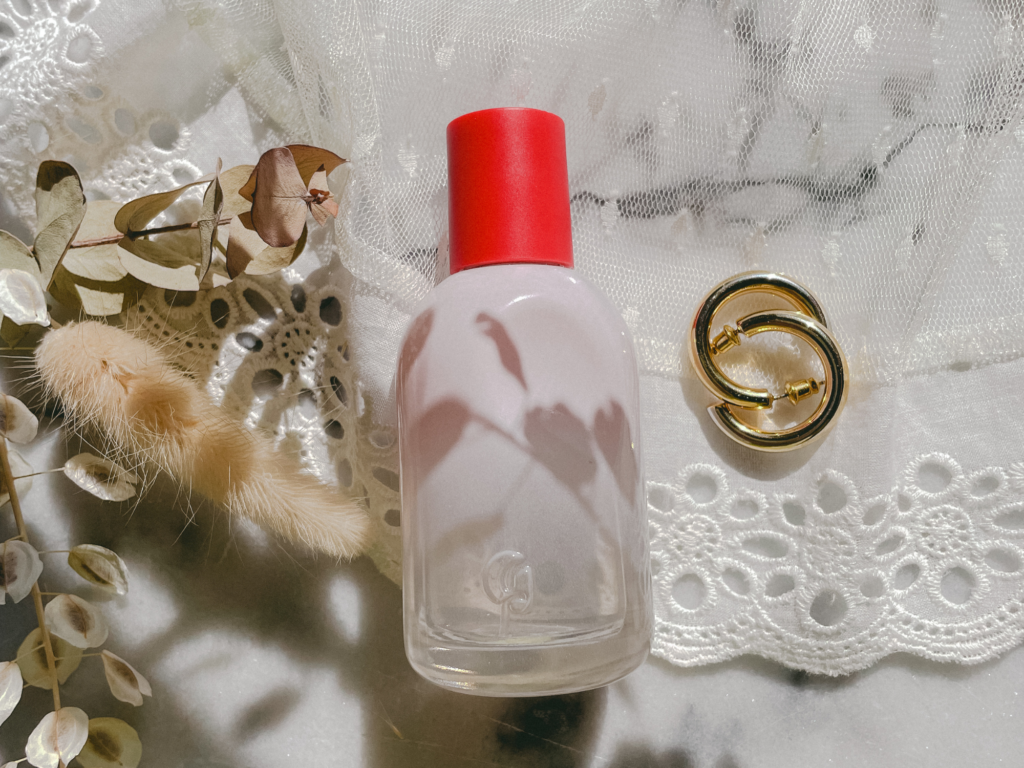
For this setting, it’s all about making the photo interesting. Stick to basic angles, but play with shadows. As you can see, I took a part of the flower bouquet I had and used it as a shadow overlay on the perfume. Simplistic, yet adding an artistic touch to the image.
Don’t be afraid to play around with your fabric for this part. At first, I wanted to use the fabric draped as part of the background, but then I realized it looked better as part of the surface.
Edit Your Images
We recommend using Lightroom to edit your photos. A free version of Lightroom can be downloaded from the app store. You do NOT need to sign up for a paid account to achieve professional looking edited photos.
When editing your photos, keep it simple. You do not want the photo to look like it has a heavy filter on it, instead that you naturally captured the image without intense editing. We recommend playing with settings such as exposure, shadows, saturation, and the black and white levels. Make sure when you’re editing, that you have the brightness on your device turned all the way up. This ensures that you’re viewing the image in it’s truest light.
Finally, after you have completed these 5 steps, you should have the successfully captured a well shot at home product image! Check out our final images below!

We also wanted to mention how little time this took! Gathering all the materials, taking the images, and editing only took about an hour! This does not need to be something that is super time consuming, if you don’t want it to be. 😉
Need more tips on this subject? Or have questions about something else? Ask us in the comments below!